Setting up broadcast channels
Updated
This guide will teach you how to:
connect communication providers.
create broadcast channels.
filter which incidents are sent into which channels.
Overview
Connecting Slack and Discord
Before you can create a broadcast channel, you must first connect a communication provider. Currently, you can choose between Slack and Discord.
Microsoft Teams will be available soon.
Under Settings → Communication → Providers, you can activate a provider. To do this, click Enable provider and follow the instructions of your chosen provider. You should grant all permissions so that notifications can reach your broadcast channels.
Once a provider has been connected, you can create a broadcast channel.
Broadcast channels are not included in the free plan. Channels created during the trial period will be deleted once the trial period ends.
Creating a broadcast channel
Go to Settings → Communication → Broadcast channels and click + Create Broadcast Channel. The creation dialog appears.
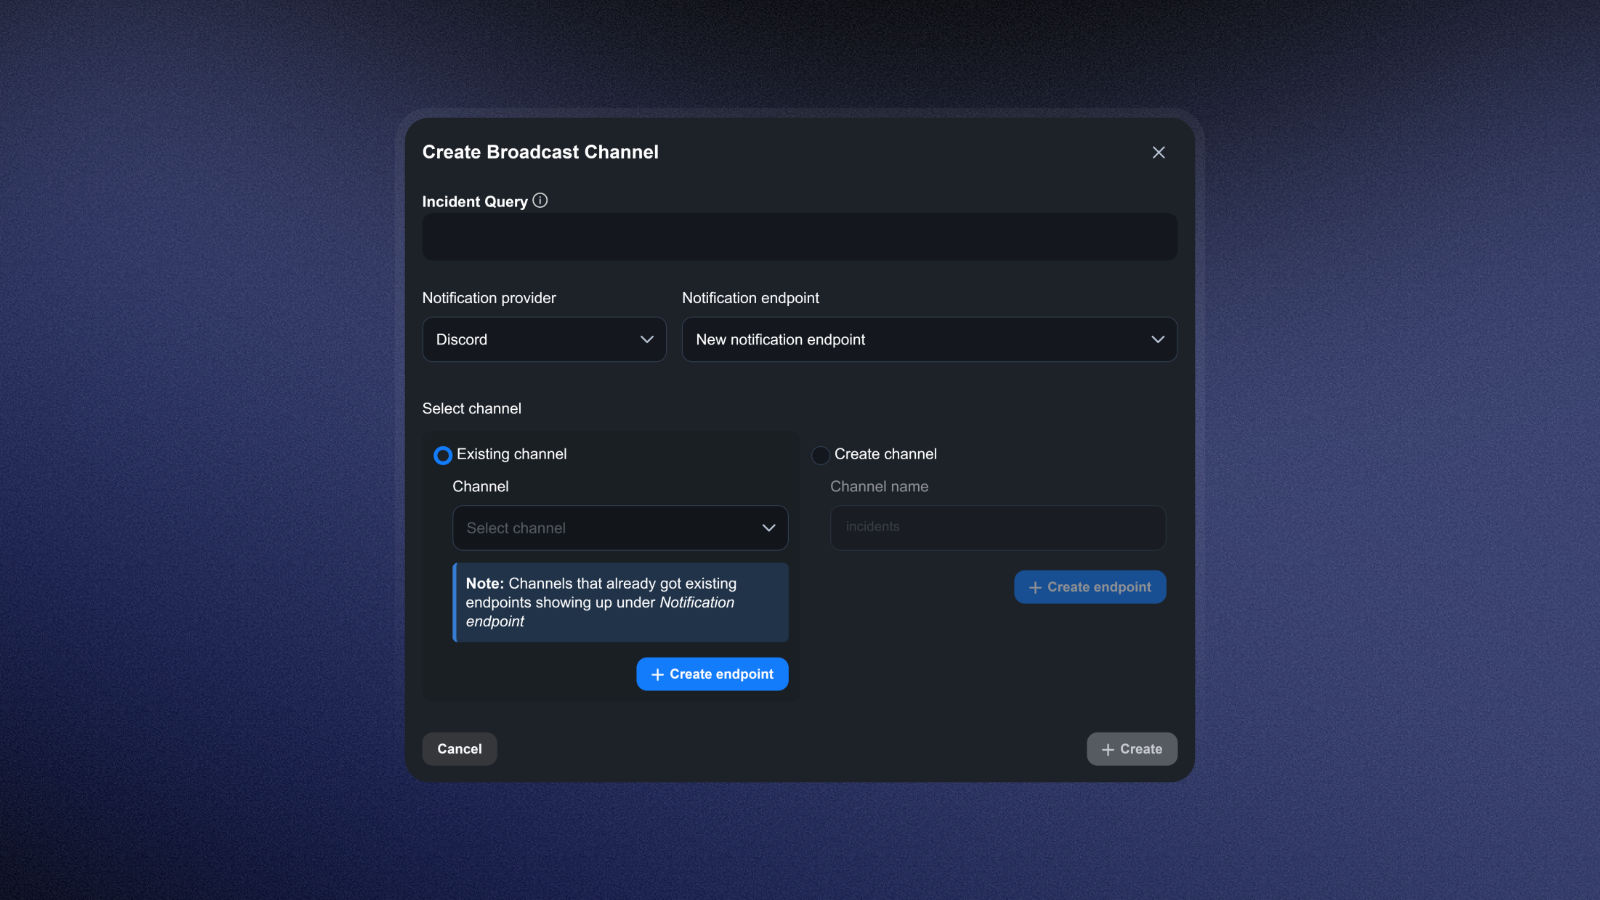
Under Notification provider, select your preferred integration. When creating your first broadcast channel, you must first create a notification endpoint in Slack or Discord under Notification endpoint. Once you've created an endpoint, you can select it again instead of having to create a new one.
You can then choose whether to create a new channel or use an existing one. Select an existing channel or name a new one, then create a new notification endpoint by tapping + Create endpoint. Your new endpoint will now be displayed, and you can finalize your broadcast channel by tapping Create.
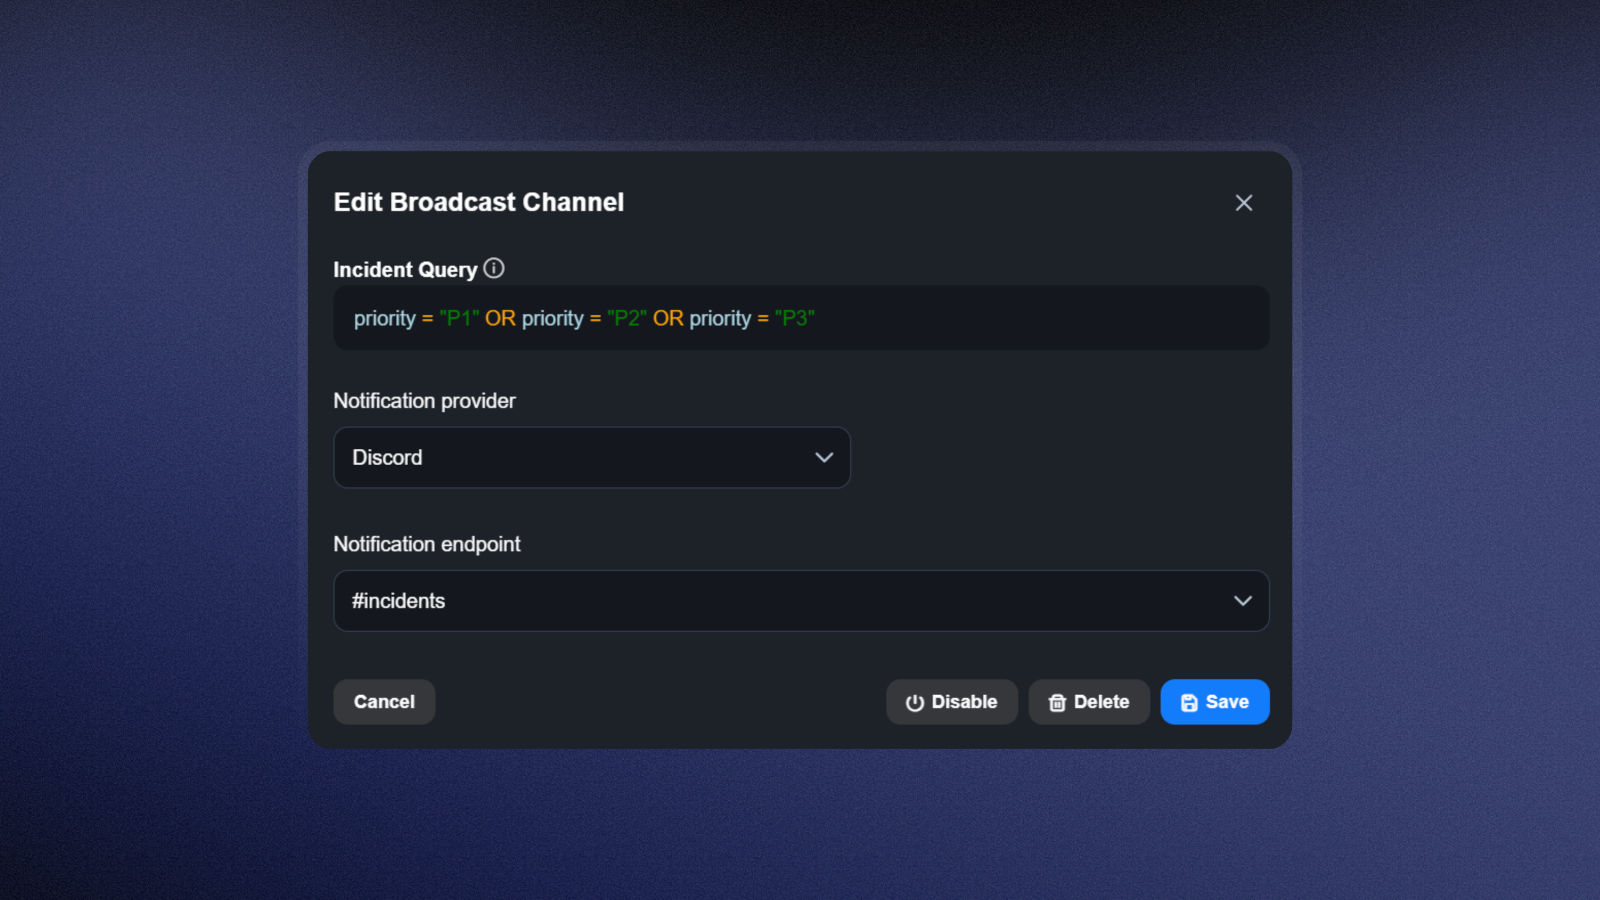
Optionally, you can set filters in the Incident Query field to prevent all incidents from being sent to your broadcast channel.
If you choose to leave the Incident Query field empty, all incidents will be sent to a broadcast channel.
Filtering with Incident Query Language (IQL)
Clicking on the Incident Query field shows options for filtering.

You can filter for the following criteria:
type
IncidentMaintenance
priority
For incidents: P1 (highest priority) to P5 (lowest priority)
For maintenance:
Emergency,SecurityandRoutine
state
For incidents:
New,Acknowledged,InvestigatingandResolvedFor maintenance:
Scheduled,In ProgressandCompleted
title
Partially matching text:
"*text*"Identical text:
"text"
You can also use these operators:
AND: All filters have to apply.OR: One of the filters has to apply.=: is!=: is not>: greater than>=: greater than or equal to<: less than<=: less than or equal to
Examples for Incident Querys
Only incidents of the highest priority whose title contains the text "Monitor" will be sent to this channel.
This channel will only receive incidents of the lowest priority, as well as maintenances.
Editing, disabling and deleting channels
You can edit a channel by clicking on it. The editing screen also lets you deactivate a channel if you don't need it temporarily. This way, you can reactivate it at any time without having to set it up again.
To do this, simply click Disable. You can easily view the status of your channels in the channel overview. Click Delete to permanently remove a channel.